 Save
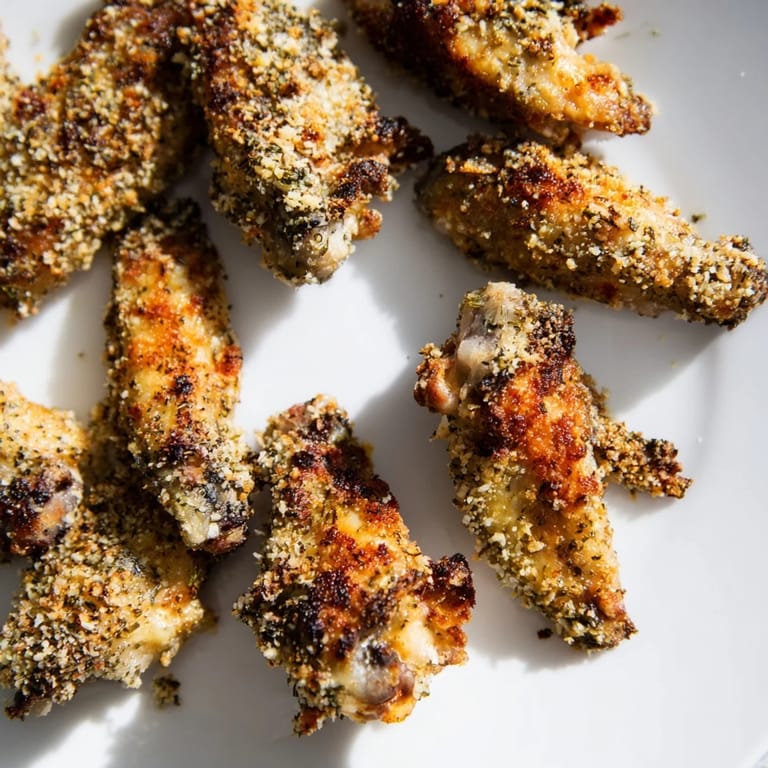
Save I discovered these wings by accident one Sunday when my oven was already hot and a friend was coming over in an hour. Rather than deep-fry like I normally would, I grabbed breadcrumbs and Parmesan from my pantry and decided to wing it—literally. The moment I pulled them out golden and crackling, my friend walked in, and their first reaction was pure joy. That day taught me that sometimes the best shortcuts become your favorite recipes.
My neighbor once brought a huge bowl of these to a neighborhood gathering, and they vanished before anyone even sat down. I remember him sheepishly admitting he'd made four batches that week—one for him to try, one that burned, and two more because the first batch disappeared too fast. That's when I knew this recipe had staying power.
Ingredients
- Chicken wings, separated into flats and drumettes: Use about 1.2 kg (2.5 lbs) total, and don't skip removing the tips—they're mostly bone and won't crisp up nicely anyway.
- Grated Parmesan cheese: Freshly grated makes a difference in texture, not just flavor; pre-shredded varieties contain anti-caking agents that affect crispiness.
- Fine breadcrumbs: The finer the crumb, the more even your coating and the better the crust bonds to the wing.
- Garlic powder, onion powder, dried Italian herbs, smoked paprika: These four ingredients build savory depth without overpowering the cheese and chicken.
- Black pepper and sea salt: Don't skip seasoning the coating mixture—it's your chance to build flavor before the wings hit the oven.
- Eggs and milk: The egg acts as your adhesive, and the milk keeps the egg from drying out too fast during baking.
- Olive oil: A light brush or drizzle before and after coating ensures the wings brown evenly and prevents sticking.
Tired of Takeout? 🥡
Get 10 meals you can make faster than delivery arrives. Seriously.
One email. No spam. Unsubscribe anytime.
Instructions
- Heat your oven and prep your station:
- Set the oven to 220°C (425°F) and line your baking sheet with parchment, brushing it lightly with olive oil. This high heat is what gives you that golden-brown crust without drying out the chicken.
- Create your wet and dry batters:
- Whisk eggs with milk in one shallow bowl until smooth, then mix Parmesan, breadcrumbs, garlic powder, onion powder, Italian herbs, paprika, pepper, and salt in another. The two-bowl system keeps your dry mixture from getting clumpy.
- Dry your wings and coat with care:
- Pat each wing completely dry with paper towels—moisture is the enemy of crispiness. Dip each wing into the egg mixture first, then press it firmly into the breadcrumb coating, really working it in so nothing falls off during baking.
- Arrange and oil your wings:
- Lay wings in a single layer on your prepared sheet without crowding, then drizzle or lightly brush them with olive oil. This step is crucial—the oil helps the coating brown and crisps up the exterior.
- Bake with a midway turn:
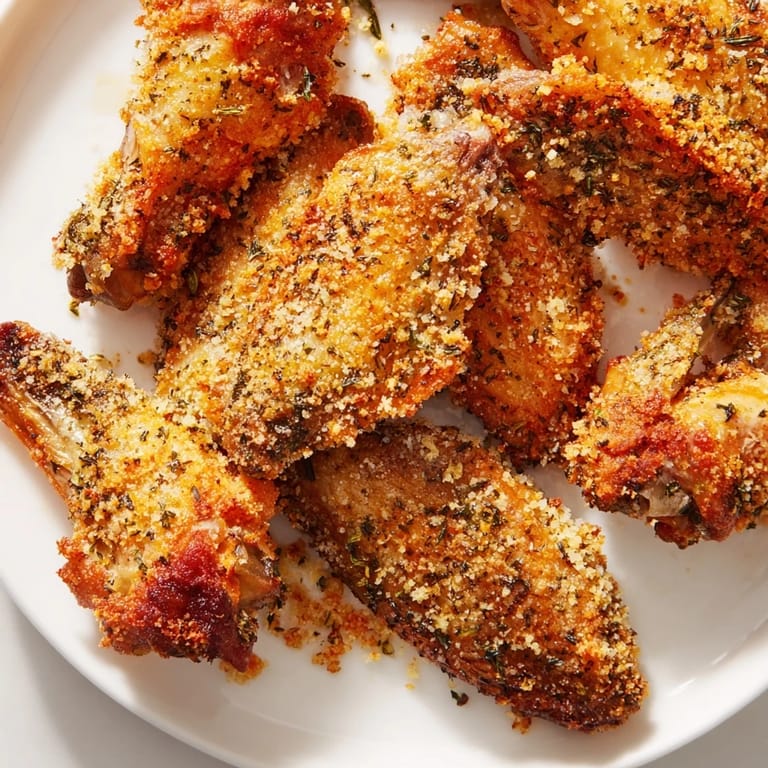
- Bake for 35–40 minutes, flipping the wings halfway through using tongs so they brown evenly on both sides. You'll know they're done when they're golden brown and crispy, and the internal temperature hits 75°C (165°F).
 Save
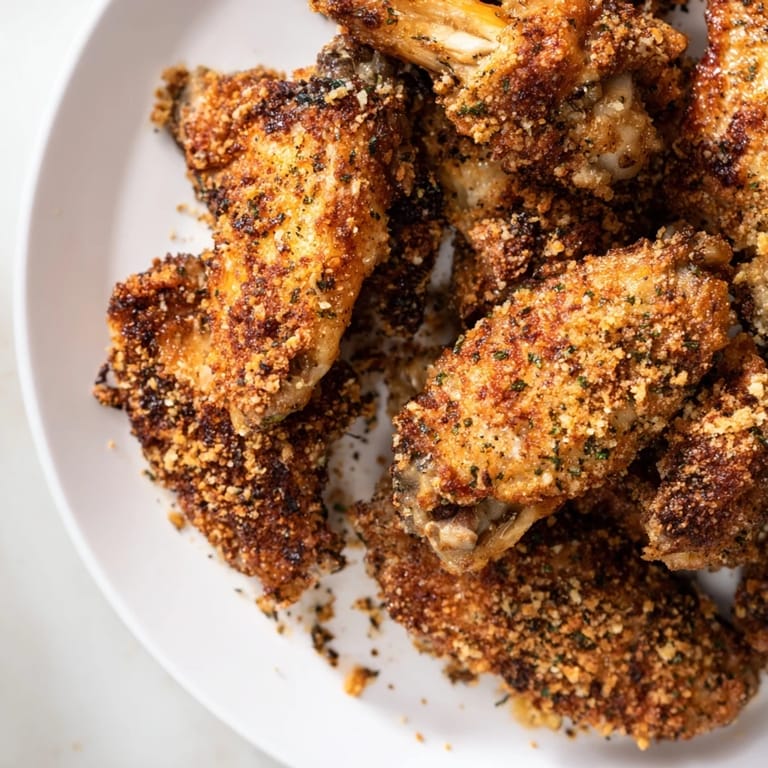
Save I once served these to my dad, who's been cooking chicken in every possible way for decades, and he asked for the recipe immediately. That moment of watching someone you respect ask for your cooking method felt like a small victory in the kitchen.
The Secret to Crispy Texture
The real magic happens at the intersection of high heat and proper coating. Most people think crispiness comes from deep frying, but this oven method proves otherwise—the key is letting the Parmesan and breadcrumbs toast directly on the wing surface. I've noticed that wings baked at 200°C stay softer, while those at 220°C develop that satisfying crunch that makes people come back for seconds.
Flavor Variations That Work
The beauty of this coating is how adaptable it is to your mood or pantry. I've swapped Italian herbs for everything from ranch seasoning mix to lemon zest mixed with thyme, and each version tastes completely different while maintaining that same crispy texture. The Parmesan base is what ties it all together, so as long as you keep that constant, you can play with the supporting flavors.
Serving and Storage Ideas
Serve these hot straight from the oven when the coating is at its crunchiest. If you're making them ahead, they'll keep in an airtight container for up to three days and reheat beautifully in a 160°C oven for about 10 minutes. I've found they're equally good for casual weeknight dinners or formal appetizers—just arrange them on a nice platter and people don't question the effort.
- Pair them with ranch, marinara, or a spicy sriracha mayo for dipping.
- Serve alongside fresh celery sticks and blue cheese dip for a classic sports-day spread.
- Make them a day ahead and reheat gently to save time when guests arrive.
 Save
Save These wings have become my go-to when I want something that tastes indulgent but doesn't tie me to the stove. There's something deeply satisfying about pulling a tray of golden, crackling chicken from the oven and watching people's faces light up.
Common Questions
- → How do I ensure crispy chicken wings?
Pat wings dry before coating to remove moisture. Bake at high heat and consider broiling for 2-3 minutes at the end to enhance crispiness.
- → Can I substitute Italian herbs with other spices?
Yes, you can swap Italian herbs for your favorite spice blend to customize the flavor.
- → Is it possible to make these wings gluten-free?
Use gluten-free breadcrumbs to maintain a crispy texture without gluten.
- → What internal temperature should the wings reach when cooked?
The wings should reach an internal temperature of 75°C (165°F) to ensure they are fully cooked.
- → What dipping sauces pair well with these wings?
Classic options include ranch dressing or marinara sauce, complemented by celery sticks or blue cheese dip.