 Save
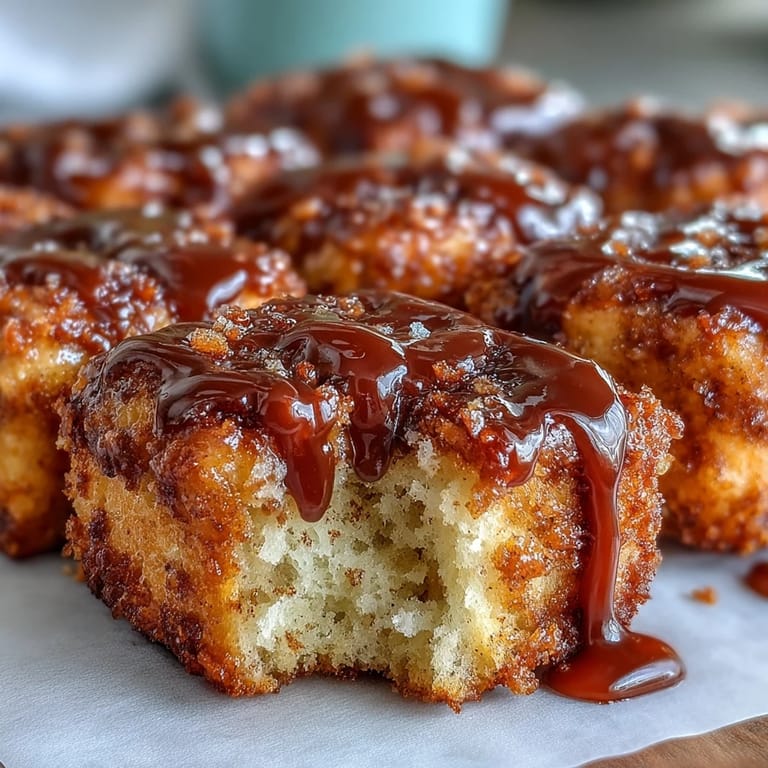
Save My kitchen smelled like an autumn morning the first time I made these maple donut bars—that rich maple sweetness drifting through every room, pulling my family in before they were even out of the oven. I had intended to make donuts, but somewhere between hunting for the donut pan and realizing I'd rather be eating than wrestling with hot oil, the idea for bars hit me. Best mistake ever.
Last fall, my neighbor texted me at 7am asking what on earth I was baking because the maple scent had wafted through our open windows. I ended up bringing over a fresh pan still warm from the oven, and we sat at her kitchen table devouring them with coffee while the leaves fell outside. She called them breakfast donuts for people who hate waking up early.
Ingredients
- 2 cups all-purpose flour: The backbone of these bars, giving them structure while keeping the crumb tender
- 1 cup granulated sugar: Sweetens the batter and helps create that gorgeous golden crust
- 1 tablespoon baking powder: The key to that signature donut puff and lift
- 1/2 teaspoon salt: Balances the sweetness and makes all the spices pop
- 1/2 teaspoon ground cinnamon: Warm spice that plays so beautifully with maple
- 1/4 teaspoon ground nutmeg: A little goes a long way—adds that classic donut shop depth
- 1/2 cup unsalted butter, melted: Melted butter creates incredible moisture and keeps the texture soft
- 1 cup whole milk: Whole milk yields the most tender crumb, though low fat works in a pinch
- 2 large eggs: Provides structure and richness for that cakey donut texture
- 1 teaspoon vanilla extract: Pure vanilla is worth it here—it rounds out all the maple goodness
- 1/2 cup maple syrup: The real deal adds genuine maple flavor throughout the batter
- 1 cup powdered sugar: Creates that smooth, pourable glaze that sets perfectly
- 1–2 tablespoons milk: Adjust to get your glaze exactly how thick or thin you like it
- 2 tablespoons maple syrup: The finishing touch that takes the glaze from sweet to something special
Tired of Takeout? 🥡
Get 10 meals you can make faster than delivery arrives. Seriously.
One email. No spam. Unsubscribe anytime.
Instructions
- Get your oven ready:
- Preheat to 350°F and grease a 9×13 pan—I love lining mine with parchment paper handles for easy lifting later.
- Whisk the dry ingredients together:
- In a large bowl, combine the flour, sugar, baking powder, salt, cinnamon, and nutmeg until well blended.
- Mix the wet ingredients:
- In a separate bowl, whisk the melted butter, milk, eggs, vanilla, and maple syrup until completely smooth.
- Combine everything gently:
- Pour the wet mixture into the dry and fold with a spatula just until combined—overmixing makes tough bars.
- Spread and bake:
- Evenly spread the batter in your prepared pan and bake for 25 to 30 minutes until a toothpick comes out clean.
- Cool them down:
- Let the bars rest in the pan for 10 minutes, then move them to a wire rack to cool completely before glazing.
- Make the maple glaze:
- Whisk powdered sugar with 1 tablespoon milk, adding more as needed to reach a thick but pourable consistency.
- Stir in the maple:
- Add the maple syrup to your glaze and whisk until smooth and glossy.
- Glaze the bars:
- Drizzle the glaze evenly over the completely cooled bars—it should self level beautifully.
- Let the glaze set:
- Wait 10 to 15 minutes for the glaze to firm up, then slice into bars and enjoy.
 Save
Save My kids now request these for every sleepover breakfast, and I have learned to double the recipe because one pan vanishes suspiciously fast among teenage boys. Something about cutting them into bars instead of traditional donut shapes makes them feel snackable in a different way—perfect for grabbing on the way out the door or lingering over with a second cup of coffee.
Make Ahead Magic
The unglazed bars keep beautifully in the freezer for up to a month. I bake a double batch on Sunday, wrap them well, and then thaw and glaze as needed throughout the week. Fresh maple donut bars on a Wednesday morning feel like a small luxury.
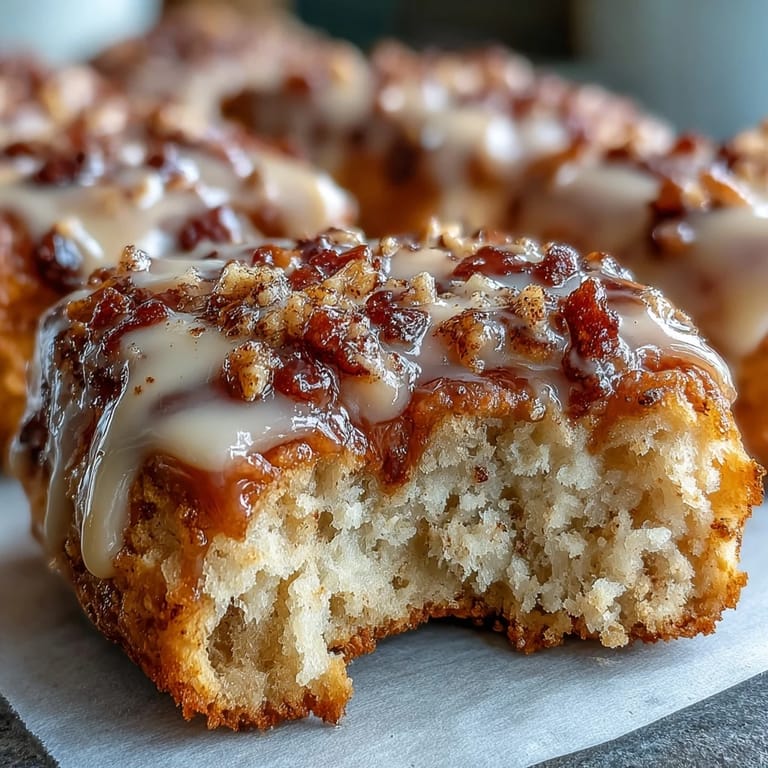
Glaze Like a Pro
If you want that stunning bakery look, pour your glaze in a slow back and forth motion across the entire pan at once rather than drizzling individually on each bar. The glaze naturally levels itself and creates those gorgeous drips down the sides. Work quickly though—it starts setting fast once it hits the cool bars.
Serving Ideas & Variations
These maple donut bars are incredibly versatile on their own, but sometimes a little extra something makes them feel extra special. Try these simple additions to transform them from everyday to celebration worthy.
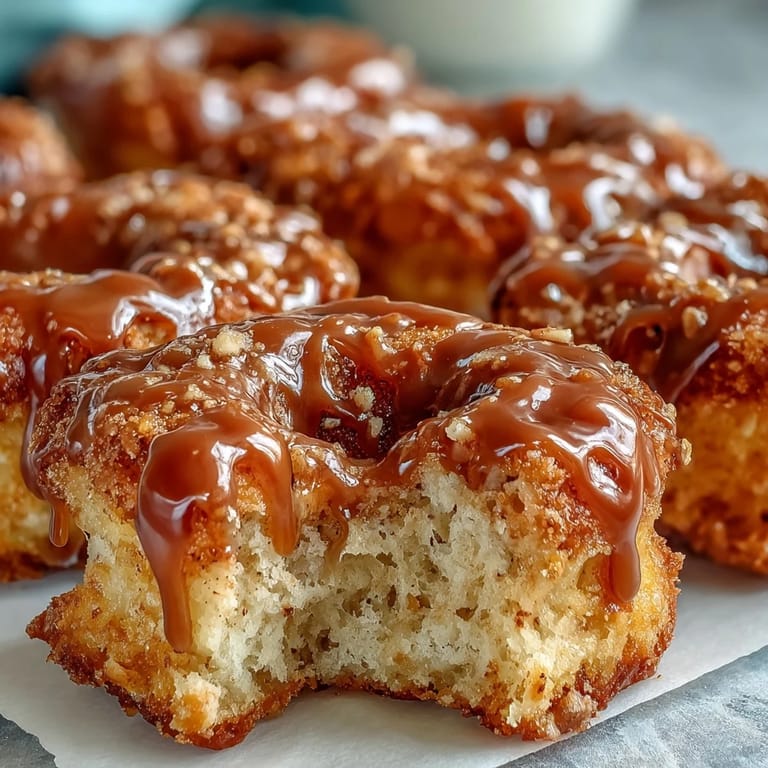
- Top with chopped pecans while the glaze is still wet for incredible texture and nutty flavor
- Whisk a teaspoon of maple extract into the glaze for an even more intense maple punch
- Serve warm with a scoop of vanilla ice cream for the most incredible dessert crossover
 Save
Save There is something wonderfully comforting about a recipe that comes together this easily but tastes like it took all morning. These maple donut bars have become my go-to for bringing warmth to any table.
Common Questions
- → Can I make these bars ahead of time?
Yes, these bars store beautifully in an airtight container at room temperature for up to 3 days. The glaze will set nicely, making them easy to pack for lunches or serve later.
- → Can I freeze maple donut bars?
Absolutely! Wrap individual bars tightly in plastic wrap and freeze for up to 2 months. Thaw at room temperature before serving—the texture remains wonderfully soft.
- → What's the best way to get that authentic maple flavor?
Use pure maple syrup rather than pancake syrup. You can also add a few drops of maple extract to the glaze for an extra boost of that distinctive maple taste.
- → Why shouldn't I overmix the batter?
Overmixing develops gluten, which can make the bars tough instead of tender. Fold gently until just combined for that light, cake-like texture you want.
- → Can I substitute the all-purpose flour?
While untested, you could try a 1:1 gluten-free flour blend. The texture may vary slightly, but the maple flavor will still shine through the glaze.
- → How do I know when the bars are done baking?
Insert a toothpick into the center—if it comes out clean or with just a few moist crumbs, they're ready. The edges should be lightly golden, and the top should spring back when gently touched.