 Save
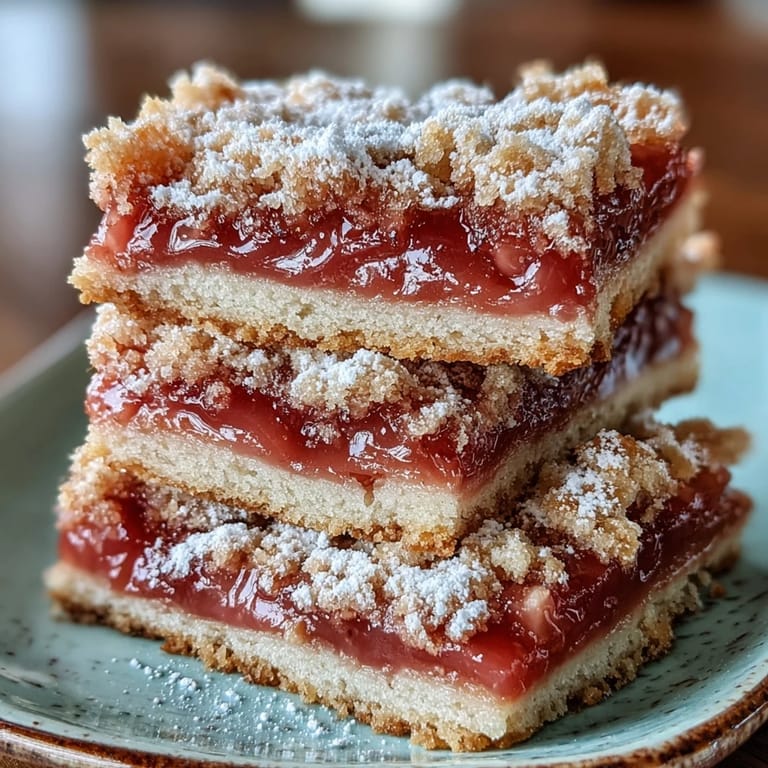
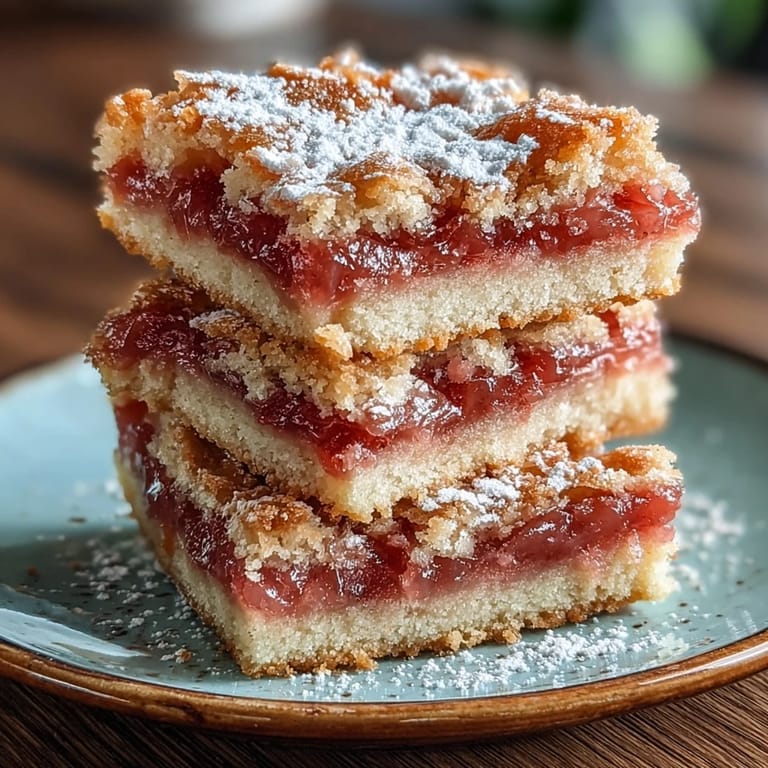
Save My neighbor Maria showed up one afternoon with a plastic container of these guava cake bars, still warm from her kitchen, and I understood immediately why she'd made them—they were the kind of dessert that demands to be shared. The first bite melted on my tongue, that perfect tension between tender cake and jammy guava filling, and I knew I had to learn her way of making them. Turns out, there's a trick to layering the dough just right so the guava doesn't sink, and Maria's patient hands guided mine through it all.
I brought a batch to my daughter's school bake sale, nervous they'd sit untouched against the brownies and cookies everyone else had brought. They were gone in twenty minutes, and three parents asked for the recipe that day. That's when I realized these weren't just dessert—they were the kind of thing that gets remembered, that makes people ask you for seconds.
Ingredients
- All-purpose flour (2 cups): Keep it measured level, not heaped, or the dough will turn dense and your layers won't work.
- Baking powder (1½ teaspoons): This lifts the cake just enough so it stays tender against the weight of the guava filling.
- Fine sea salt (¼ teaspoon): A small amount cuts the sweetness and makes the guava taste more vibrant.
- Unsalted butter (½ cup, softened): Room temperature is non-negotiable here—cold butter won't cream properly and you'll lose that fluffy texture.
- Granulated sugar (¾ cup): This sweetens the cake itself, so the guava becomes the surprise rather than the main event.
- Large eggs (3, room temperature): Cold eggs won't incorporate smoothly, and you want that silky batter that holds air.
- Vanilla extract (1 teaspoon): Use real vanilla if you have it—it adds a subtle warmth that guava loves.
- Whole milk (⅓ cup): The dairy makes the crumb tender and keeps it from drying out as it cools.
- Guava paste (12 oz, sliced thin): Buy the kind in blocks, not the spreadable type—you need strips that hold their shape when you layer them.
Tired of Takeout? 🥡
Get 10 meals you can make faster than delivery arrives. Seriously.
One email. No spam. Unsubscribe anytime.
Instructions
- Ready your workspace:
- Line your 8x8-inch pan with parchment paper, making sure there's enough overhang on two sides so you can lift the whole thing out later. This step sounds small, but it saves you from frustration when you're trying to cut neat bars.
- Combine the dry team:
- Whisk the flour, baking powder, and salt in a medium bowl until they're evenly distributed. This prevents any lumps from hiding in the finished cake.
- Cream butter and sugar together:
- Beat them in a large bowl for about 2-3 minutes until the mixture turns pale and fluffy—you're literally aerating the dough. This is where patience pays off.
- Introduce the eggs slowly:
- Add them one at a time, beating well after each addition so they emulsify into the butter mixture. If you rush this, the batter can break and become grainy.
- Mix in the vanilla:
- A quick stir, that's all you need—just enough to disperse it evenly throughout.
- Alternate wet and dry layers:
- Add a third of the flour mixture, then half the milk, then another third of flour, then the rest of the milk, finishing with the last flour portion. Stop as soon as everything comes together—overmixing toughens the cake.
- Spread the bottom layer:
- Pour half the batter into the prepared pan and use a spatula to smooth it into an even layer. This is your foundation, so take a moment to get it level.
- Layer the guava carefully:
- Arrange the guava paste strips in a single layer on top of the dough, leaving just a tiny border around the edges. They should lay flat, not overlapping.
- Cover with the remaining dough:
- Dollop spoonfuls of the second half of the batter over the guava, then use a damp spatula or your fingers to gently spread it to the edges. The moisture helps it glide over the guava without dragging it around.
- Bake until golden:
- Set your oven to 350°F and bake for 38-42 minutes—you're looking for a golden top and a clean toothpick inserted into the cake layer itself (not the guava). The center should feel just set when you touch it lightly.
- Cool completely before cutting:
- Leave the whole thing in the pan until it's completely cool, then lift it out using the parchment overhang. Cutting into warm cake makes it crumbly—patience here creates clean, beautiful bars.
 Save
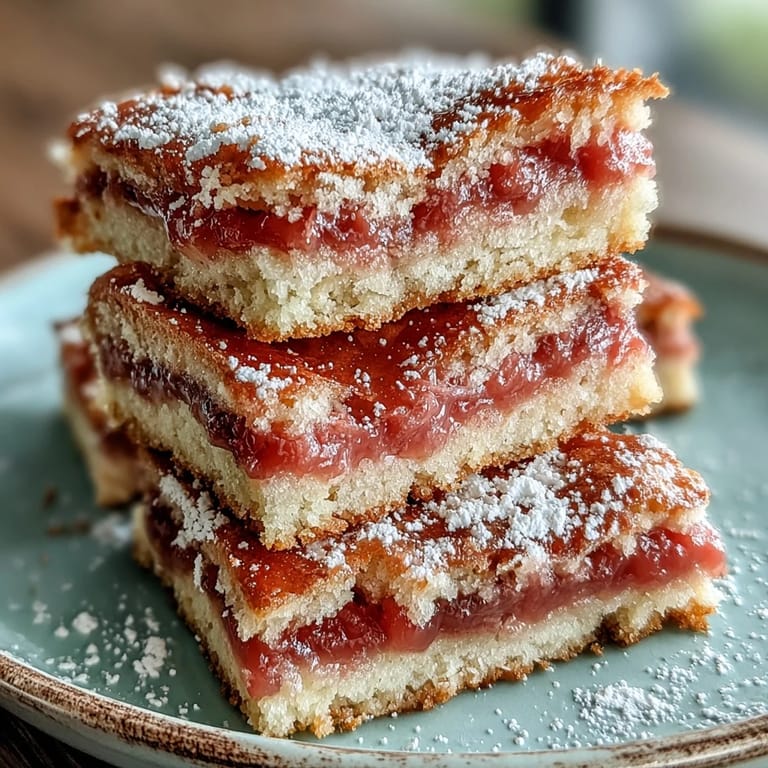
Save One evening my son came home from college and caught the smell of these baking as he walked in the door. He didn't even set his bag down before asking if there were any left, and we sat at the kitchen table eating them straight from the cooling pan, talking about everything and nothing at the same time. That's when I realized these bars were about more than flavor—they were about moments.
The Guava Paste Question
Finding good guava paste used to feel like a treasure hunt, but now it's easier than ever. You want the blocks, not the canned guava jelly, because the paste holds its texture when you layer it and bake it. Look in the international aisle or the Hispanic foods section of your market, and don't be afraid to ask—many store employees can point you straight to it. If your paste is very firm, let it sit at room temperature for a few minutes before slicing, and use a sharp knife with a quick sawing motion rather than pressing down.
Why This Cake Stays Tender
The secret isn't just the ingredients—it's the method. By creaming the butter and sugar first, you trap air bubbles that make the crumb light. The milk binds everything without making it heavy, and the guava paste actually insulates the bottom layer of cake so it doesn't over-bake and dry out. The whole thing works as a system, each layer supporting the others.
Storage, Serving, and Small Joys
These bars keep beautifully for three days in an airtight container at room temperature, and they're just as good on day two as they are fresh. Some people chill them and enjoy them cold, which makes the guava taste even more concentrated. They pack wonderfully in lunchboxes, arrive safely in care packages, and somehow taste even better when someone else has made the effort to share them.
- For a tropical hint, stir a pinch of finely grated lime zest into the batter—it brightens everything without overpowering the guava.
- If you want richness, mix a few tablespoons of cream cheese into your guava paste before layering it in.
- Make these a day ahead if you're bringing them somewhere—they actually taste better once they've rested.
 Save
Save Make these bars once and you'll understand why they're woven into so many kitchen memories. They're the kind of recipe that gets passed hand to hand, just like Maria gave them to me.
Common Questions
- → What makes these bars distinctly Cuban?
The combination of guava paste with buttery pastry is a classic Cuban dessert tradition. Guava is one of Cuba's most beloved tropical fruits, and pairing it with tender cake creates the beloved pastelitos de guayaba flavor profile that's central to Cuban patisserie.
- → Can I use fresh guava instead of paste?
Guava paste is recommended because it provides concentrated sweetness and holds its shape during baking. Fresh guava would release too much moisture and make the bars soggy. If you can't find guava paste, guava membrillo or thick guava preserves work as alternatives.
- → How should I store these bars?
Store in an airtight container at room temperature for up to 3 days. The bars actually develop deeper flavor on the second day as the guava filling melds with the pastry. Avoid refrigerating as this can dry out the tender cake texture.
- → Why is my dough difficult to spread over the guava?
The dough can be sticky. Try using damp fingers or a spatula lightly sprayed with cooking spray to spread it. Alternatively, press the dough into the pan bottom first, add the guava, then crumble the remaining dough over the top rather than spreading it.
- → Can I add cream cheese to these bars?
Absolutely! You can create a marble effect by dotting small pieces of cream cheese over the guava layer, or blend softened cream cheese with some of the dough before spreading. This adds a tangy contrast that beautifully complements the sweet guava.
- → What's the best way to cut clean bars?
Let the bars cool completely before cutting. Use a sharp knife and wipe it clean between cuts for the neatest edges. For extra precision, chill the cooled pan for 30 minutes before slicing—this firms the guava layer and prevents it from smearing.