 Save
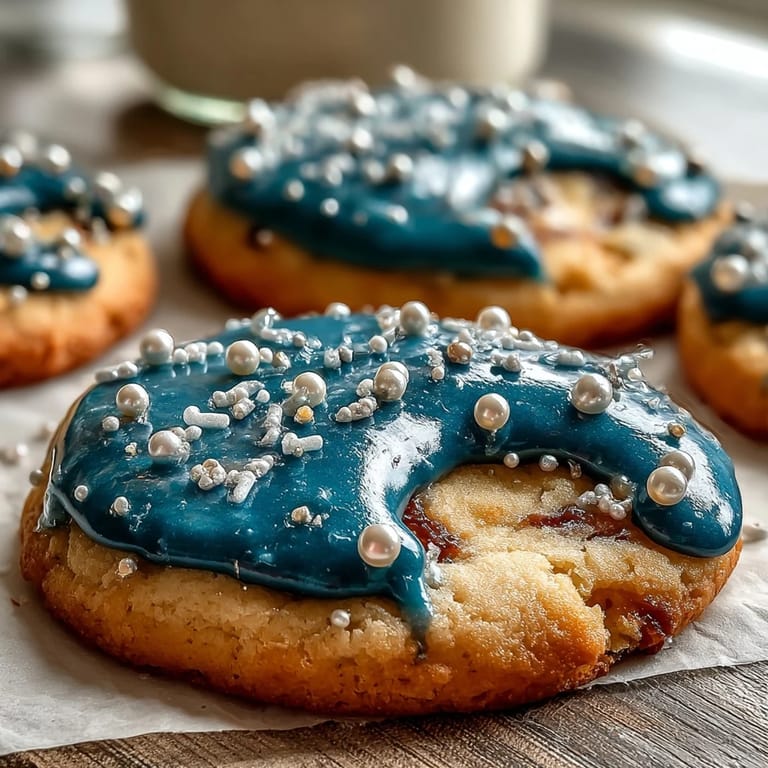
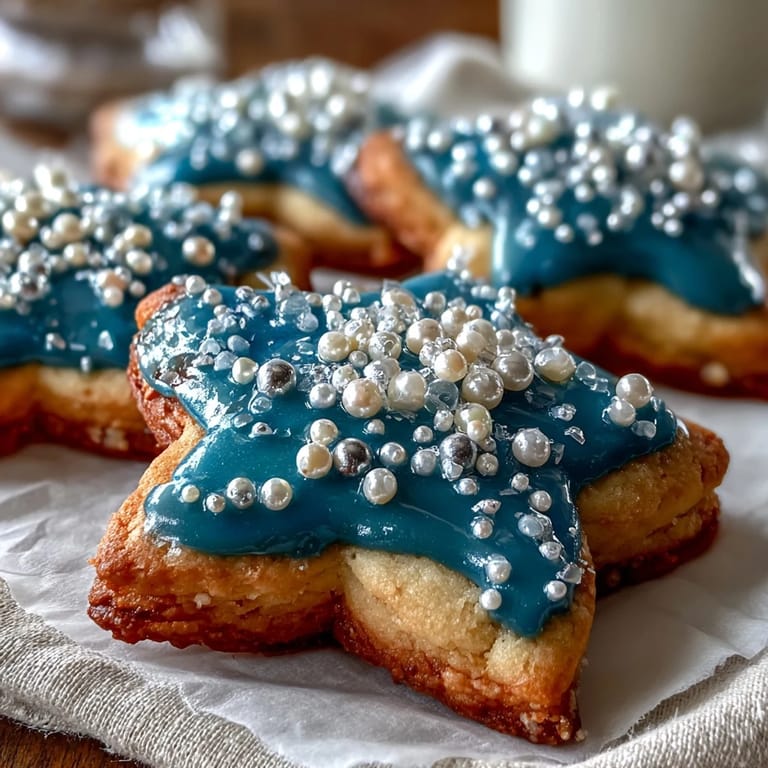
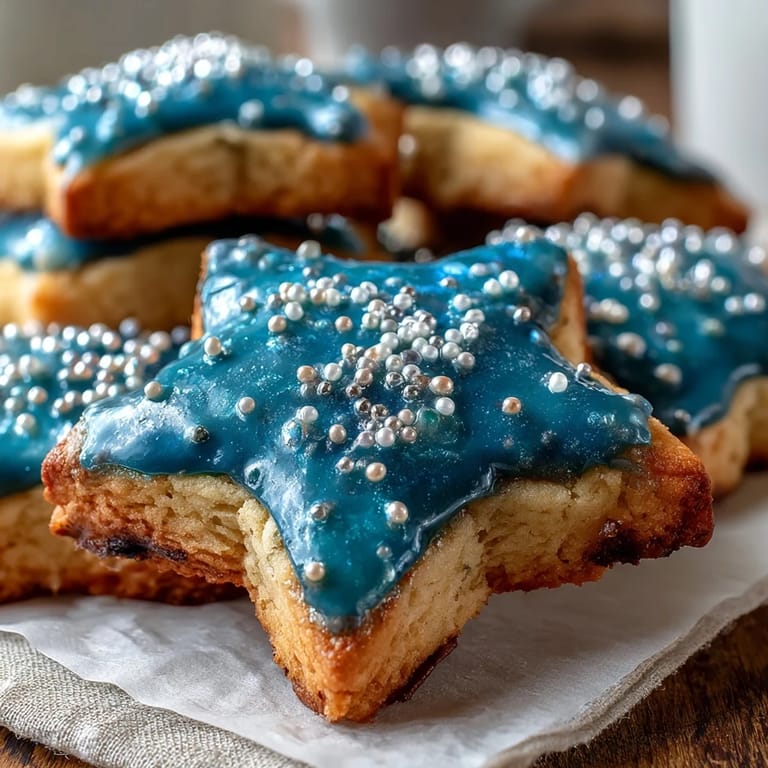
Save There's something almost magical about turning butter and sugar into edible night sky. My nephew was obsessed with constellation apps that summer, constantly pointing his phone upward during our backyard dinners, so I challenged myself to make something he could actually eat. These Pisces sugar cookies emerged from that moment—delicate, starry little disks that somehow made him look up from screens and down at his plate instead.
I made these for a dinner party where someone mentioned they were born in March, and suddenly everyone was asking which constellation belonged to them. By midnight, I was piping tiny stars onto cookies like some possessed pastry chef, but those moments when people connected the dots and said "oh, that's me" made every sticky finger worth it.
Ingredients
- All-purpose flour (2 1/2 cups): This is your foundation—don't sift it beforehand, just whisk it with the leavening agents to keep the crumb tender and prevent dense cookies.
- Baking powder (1/2 teaspoon): A gentle lift that keeps these cookies from spreading too thin while baking.
- Salt (1/4 teaspoon): The secret that makes the butter shine and balances the sweetness so the flavor feels grown-up.
- Unsalted butter (3/4 cup, softened): Softness matters here—if it's cold, your dough becomes grainy; if it's too warm, the cookies spread everywhere.
- Granulated sugar (1 cup): This feeds the cookies their crisp edges and delicate crunch that makes them memorable to bite into.
- Egg (1 large): Room temperature is your friend; a cold egg can seize the batter and make mixing harder.
- Pure vanilla extract (2 teaspoons): Skip the imitation—the real stuff adds depth that transforms these from blank canvases into something genuinely delicious.
- Powdered sugar (2 cups, sifted): Lumpy icing looks amateurish, so take the extra thirty seconds to sift before mixing.
- Meringue powder (2 tablespoons): This creates the glossy, hard-drying finish that makes your piping work actually stay put instead of sliding around.
- Water (3–4 tablespoons): Add it gradually because consistency changes faster than you'd think once you start mixing.
- Gel food coloring: Gels won't thin your icing like liquid food coloring does, and navy blue actually looks like a night sky rather than murky dishwater.
- Edible gold or silver pearls: These catch light and make people think you're fancier than you actually are, which is the whole point.
Tired of Takeout? 🥡
Get 10 meals you can make faster than delivery arrives. Seriously.
One email. No spam. Unsubscribe anytime.
Instructions
- Whisk your dry ingredients together:
- In a medium bowl, combine the flour, baking powder, and salt, stirring them together gently so everything's evenly distributed. This step prevents lumps from hiding in the dough later.
- Cream the butter and sugar until fluffy:
- In your large bowl, beat the softened butter and sugar together for about two to three minutes until the mixture looks almost pale and cloud-like—this is where the cookies get their tender crumb. Don't rush this; the air you're beating in matters.
- Add the egg and vanilla:
- Drop the egg in and beat until there are no streaks of yolk visible, then add the vanilla and mix until the whole thing smells like warmth and vanilla. If it looks slightly broken or grainy, you're probably fine—it'll come together once the flour goes in.
- Gently fold in the dry ingredients:
- Add the flour mixture in two or three additions, mixing just until you don't see white streaks anymore. Overmixing at this point makes tough cookies, and tough cookies are nobody's friend.
- Chill the dough:
- Divide your dough in half, flatten each into a disk, wrap them in plastic, and tuck them into the fridge for at least an hour. Cold dough is patient dough—it won't fight you when you try to roll it out.
- Preheat and prepare:
- Set your oven to 350°F and line your baking sheets with parchment paper while the oven warms up. This takes about ten minutes and gives your hands something to do while you wait.
- Roll and cut your cookies:
- On a lightly floured surface, roll the dough to about 1/4-inch thickness—aim for consistency so they all bake at the same speed. Cut into circles or any shape that calls to you, though circles work best for constellation piping.
- Bake with patience:
- Space the cookies about an inch apart on your prepared sheets and bake for eight to ten minutes until the edges turn just golden but the centers still look barely set. They'll firm up as they cool, and that's when the magic happens.
- Cool completely on racks:
- Transfer them to wire racks and let them cool all the way before decorating. Warm cookies with wet icing are a disaster waiting to happen.
- Make your royal icing:
- Whisk together the sifted powdered sugar, meringue powder, and three tablespoons of water until stiff peaks form—it should look like glossy cloud. If it's too thick, add more water one teaspoon at a time; if it's too thin, add more powdered sugar.
- Tint and frost:
- Divide your icing and tint one portion navy blue for the night sky, leaving some white for stars and constellation lines. Frost your cooled cookies with the blue icing and let it set for about fifteen minutes so it firms up enough for piping.
- Pipe your constellation:
- Fill a piping bag with white icing and a fine tip, then pipe the two stars of Pisces and the delicate line connecting them across the blue background. Trust your hand—even wobbly lines look intentional when they're supposed to be stars.
- Add your pearls while wet:
- Before the white icing dries, gently press edible pearls at the star points where your piping stops. This is when they'll stick best and look most like actual constellations.
- Let everything dry:
- Set the cookies on a clean surface and leave them untouched for at least a few hours so the icing hardens completely. Patience here means they'll travel and stack without smudging.
 Save
Save The best part happened when my friend's daughter piped her own Pisces constellation on a cookie and announced she now understood her astrological sign in a way no app had ever explained. Something about the act of creating it with her own hands made it real to her, and that's when I understood why people make special things for each other.
Why This Works as a Gift
These cookies feel personal without requiring you to actually know someone's favorite flavor. The constellation becomes a conversation starter, a little detail that shows you were thinking about them specifically. Pack them in a clear box tied with ribbon and suddenly you're not just giving cookies—you're giving someone a tiny piece of their own sky.
The Icing Technique That Changes Everything
Royal icing intimidates people until they realize it's just three ingredients that taste like sweetened air. The meringue powder is the secret ingredient that keeps it from weeping or sliding around—skip it and you'll spend half the night watching your stars melt into the background. Once you trust the icing, the piping becomes meditative rather than stressful, and that's when the constellations actually come out pretty.
Customization for Every Stargazer
While Pisces is beautiful, these cookies work just as well for any of the twelve zodiac constellations, or even for real astronomy lovers who might appreciate Orion or the Big Dipper. The color scheme can shift too—try silver icing on black-tinted cookies for a more dramatic effect, or go full rainbow for a birthday celebration. You can also swap the edible pearls for nonpareils, dragées, or even tiny sugar crystals for completely different textures and looks.
- Reference constellation charts online so your piping actually resembles the real pattern.
- Make an extra batch of plain blue cookies to practice piping on before you decorate the final versions.
- Store decorated cookies in an airtight container with parchment between layers so they don't stick or break.
 Save
Save These cookies remind us that dessert doesn't have to be complicated to feel meaningful. Every time someone recognizes their constellation on their plate, you'll understand why people remember the people who made them special things.
Common Questions
- → What makes the icing ideal for detailed decoration?
The royal icing dries hard and smooth, perfect for piping fine constellation lines and placing delicate edible pearls without smudging.
- → How long should the dough chill before baking?
Chilling the dough for at least one hour ensures the cookies hold their shape and develop a tender texture.
- → Can I use store-bought icing for this design?
Yes, store-bought royal icing can be a convenient substitute, but homemade icing offers better control over consistency and color.
- → What tools are essential for shaping and decorating these cookies?
A rolling pin, cookie cutters, piping bags with fine tips, and edible decorating pearls help craft precise shapes and detailed designs.
- → Are these cookies suitable for vegetarians?
Yes, all ingredients used comply with a vegetarian diet, making them a sweet treat for diverse dietary preferences.